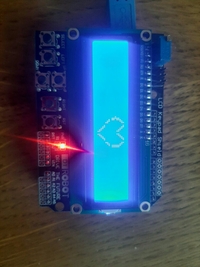
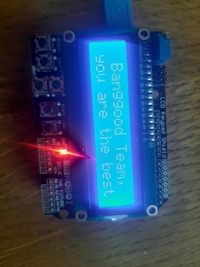
아두이노와 공식 아두이노 보드와 함께 작동하는 제품인 로봇 LCD 1602 보드용 키패드 쉴드 블루 백라이트
US$5.90
리뷰의 일부가 자동 번역되었습니다.
Makes it really easy to add a LCD to your Arduino projects. The only con is that it doesn't have headers to add wires. It just have holes for you to solder your own headers. The LCD uses 6 ports and the keypad uses only one. Works fine with Arduino Leonardo and UNO.
Test avec une carte MEGA2560. Prendre le lien suivant : http://www.dfrobot.com/wiki/index.php?title=Arduino_LCD_KeyPad_Shield_(SKU:_DFR0009) Fonctionne super bien. Le réglage de l'écriture en blanc sur bleu par le potentiomètre a une forte amplitude, on arrive même a écrire bleu foncé sur fond bleu clair. Une étoile en moins car l'écran comporte un défaut mais en dehors de la zone d'affichage.
The one I received is the 1.0 version of the shield. The only difference are the resistor divider values for the button network. I soldered on some female headers to further connect some breadboard wires on top of this thing. Works great and best price I could find on the internets. The manual and example code for this device is located here: http://www.dfrobot.com/wiki/index.php?title=Arduino_LCD_KeyPad_Shield_(SKU:_DFR0009)
Cegou tudo ok, bom aspecto e qualidade. Arrived everything ok, good looking and quality.


Great value and no real issues. Like other people have mentioned a lot of the pins arrived bent and needed straightening. Its annoying but not a deal breaker. if you search the interwebs for "keypad shield test sketch" you will find a sketch to get you up and running. If your wondering how to line up the pins, just make sure the A0-A5 pins on the shield match with the A0-A5 on the board. One thing to note you may find there is no text on the screen in which case you will have to turn the potentiometer screw (the brass screw on the blue box in the top right) clockwise many many times before you begin to see the text.
As per http://forum.arduino.cc/index.php?topic=96747.0 there is a problem with the backlight control pin. With the board that I received if you attempt to use the backlight control you can potentially break the AVR in your arduino board. Otherwise the board works perfectly including the backlight, just don't try and switch the backlight off with pin 10.
Works very good. Tested with this code : http://www.dfrobot.com/wiki/index.php?title=Arduino_LCD_KeyPad_Shield_(SKU:_DFR0009). Just take the v1.0 values. The markings are not very well made, but all the electronics works great! I will buy more
Fast delivery. Fine packing. Functional test shows that everything is according to item description. Potentiometer was set too high, so it is necessary to adjust it. Usage of standard Liquid Crystal library.
Well packaged, received in good condition and excellent delivery time (9 calendar days from order). I bought this just for experimentation.


Works perfect


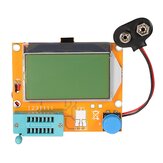
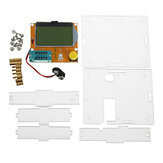
Geekcreit® LCR-T4 Mega328 트랜지스터 테스터 다이오드 트라이오드 커패시턴스 ESR 미터 셸 포함

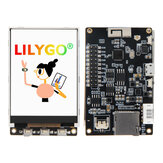
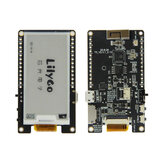
LILYGO® TTGO T4 V1.3 ILI9341 2.4인치 LCD 디스플레이 백라이트 조정 CH9102F ESP32 개발 보드 WIFI 무선 블루투스 모듈
Geekcreit 조립 된 가이거 카운터 모듈 밀러 튜브 GM 튜브 핵 전자기침 광ㄴ가이크렛 아두이노와 함께 작동하는 제품
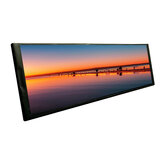
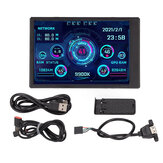
8.8인치 롱 스트립 LCD 화면 1920*480P HD 드라이버 보드 보조 모니터 AIDA64 서브 디스플레이 CPU GPU SSD 정보

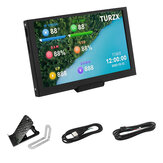
7인치 IPS/TN AIDA64 LCD 디스플레이 미니 PC 터치 HDMI 모듈 1024 x 600 Raspberry Pi 3 Pi4 PC 모니터 Moniteur Orange pi
18650 리튬 배터리용 XH-M240 배터리 용량 테스터 mAh mWh 디지털 측정 리튬 배터리 전원 감지 테스터 및 전압계
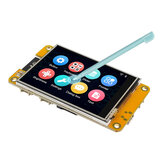
LILYGO® T-Display-S3 ESP32-S3 1.9인치 ST7789 터치 LCD 디스플레이 개발 보드 WiFi Bluetooth5.0 무선 모듈

8.8인치 용량성 터치 모니터 온도 모니터링 롱스트립 스크린 480x1920 Windows Linux Raspberry Pi용 AIDA64
ESP32 ESP32S 18650 배터리 충전 보호판 V3 마이크로 USB Type-A USB 0.5A 테스트 충전 보호판 Geekcreit의 아두이노와 함께 동작하는 제품들

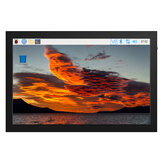
Raspberry Pi 4B / 3B+/ 3A+/ 3B 용 4.3 인치 QLED 디스플레이 용 커패시티브 터치 스크린 MIPI DSI 인터페이스 800×480
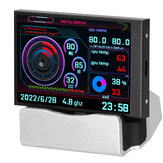
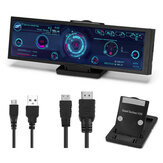
2.1인치 수냉식 IPS USB 보조 화면 내장 스크린 모니터 컴퓨터 상태 360도 회전 480 × 480 LCD 디스플레이 CPU GPU RAM HDD 모니터링 장치


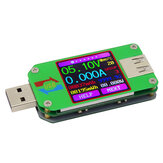
FNB38 전압 계량기 USB 테스터 QC4+ PD3.0 2.0 PPS 고속 충전 프로토콜 용량 테스터 5A 5V 12V 24V

오렌지 파이 5/5B/5B PLUS 개발 보드용 5인치 MIPI DSI 디스플레이용 전성 터치 스크린 720*1280 720P IPS LCD

새로운 컴퓨터 모니터 3.5 인치 키트 IPS TYPE-C 타입 보조 화면 CPU GPU RAM HDD 조합 세트
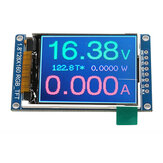
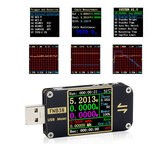
RIDEN® UM24/UM24C USB 2.0 컬러 LCD 디스플레이 테스터 전압 전류 미터 볼트미터 안페리오미터 배터리 충전 케이블 저항 측정
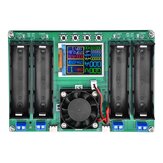
LCD 디스플레이 18650 리튬이온 배터리 디지털 측정 리튬이온 배터리 전원 탐지 모듈 4 채널 배터리 용량 테스터 DC 5V
RIDEN® UM34 / UM34C 어플리케이션용 USB 3.0 Type-C DC 전압계 전류계 전압 전류 미터 배터리 충전 측정 케이블 저항 검사기

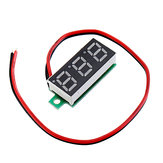
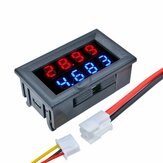
5개 미니 디지털 전압계 전류계 DC 100V 10A 전압계 전류계 테스터 블루+레드 듀얼 LED 디스플레이

10 개의 ESP32 ESP32S 18650 배터리 충전 방패 V3 Micro USB 유형-A USB 0.5A 테스트 충전 보호 기판
FNIRSI-FNB58 USB QC/PD 전압 및 전류 측정기 테스터 Type-C 멀티 기능 빠른 충전 테스터 HD 스크린 디스플레이 인간 컴퓨터 상호작용 케이블 감지 측정 모듈
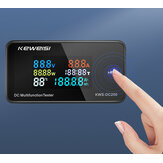
KWS-DC200 0-200V 0-100A DC 디지털 디스플레이 전압 및 전류계 컬러 스크린 전력 온도 테스터 타이머

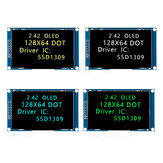
1.54인치 OLED 디스플레이 LCD 화면 모듈 해상도 128*64 SPI/IIC 인터페이스 SSD1309 드라이버

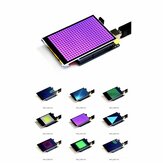
2.4 인치 240 * 320 ILI9341V 스마트 디스플레이 스크린 2.4 '' SPI 시리얼 TFT LCD 모듈 With / Without Touch 디스플레이 스크린
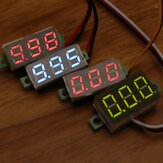
0.56인치 블루 레드 듀얼 LED 디스플레이 미니 디지털 전압계 아무메터 DC 100V 100A 패널 앰프 볼트 전압 전류계 테스터
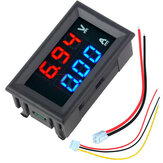
Geekcreit® 미니 디지털 볼트미터 암페어미터 DC 100V 10A 볼트미터 전류계 테스터 블루+레드 듀얼 LED 디스플레이

1.28 인치 TFT LCD 디스플레이 모듈 라운드 RGB 240x240 GC9A01 드라이버 4와이어 SPI 인터페이스 IPS 스크린
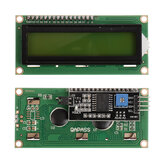
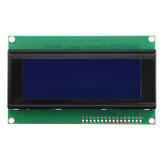
HW-060B 1602 LCD 5V 황록색 화면 IIC I2C 인터페이스 모듈 1602 LCD 디스플레이 어댑터 보드
다기능 USB 케이블 테스터 USB A to Type-c Micro Lighting 단락 온오프 데이터 케이블 테스트 도구
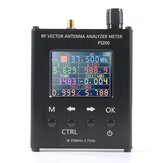
N1201SA 37.5M-2.7G UV RF 벡터 임피던스 ANT SWR 안테나 분석기 미터 테스터 정확도 기동성 기기


XH-W3001 10A 12V 24V 220V AC 디지탈 LED 온도 컨트롤러 인큐베이터 냉각 난방 스위치 온도 조절기 NTC 센서

Banggood 5V LCD 디스플레이 18650 리튬 전지 용량 테스터 전원 검출기 모듈 2 Way 충 방전 Type-c 포트
Geekcreit® DC 100V 10A 0.28인치 미니 디지털 볼트미터 암페어미터 4 비트 5 선 전압 전류계 LED 듀얼 디스플레이
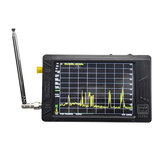
tinySA ULTRA 100k-5.3GHz 휴대용 스펙트럼 분석기, 4인치 TFT 디스플레이, 고주파 출력 신호
Geekcreit® 0.28인치 이중 선 2.5-30V 쓰리와이어 0-100/500V 디지털 디스플레이 DC 볼트미터 조정 가능한 전압계